

How do I issue a suspension?
 5:50
5:50
"How do I issue a suspension?"
The default suspension period days sets the initial number of calendar days that any person's suspension period is automatically set to. The number of days can be changed later, when you actually issue the suspension.
To set a default suspension period days, and see it used when issuing a suspension:
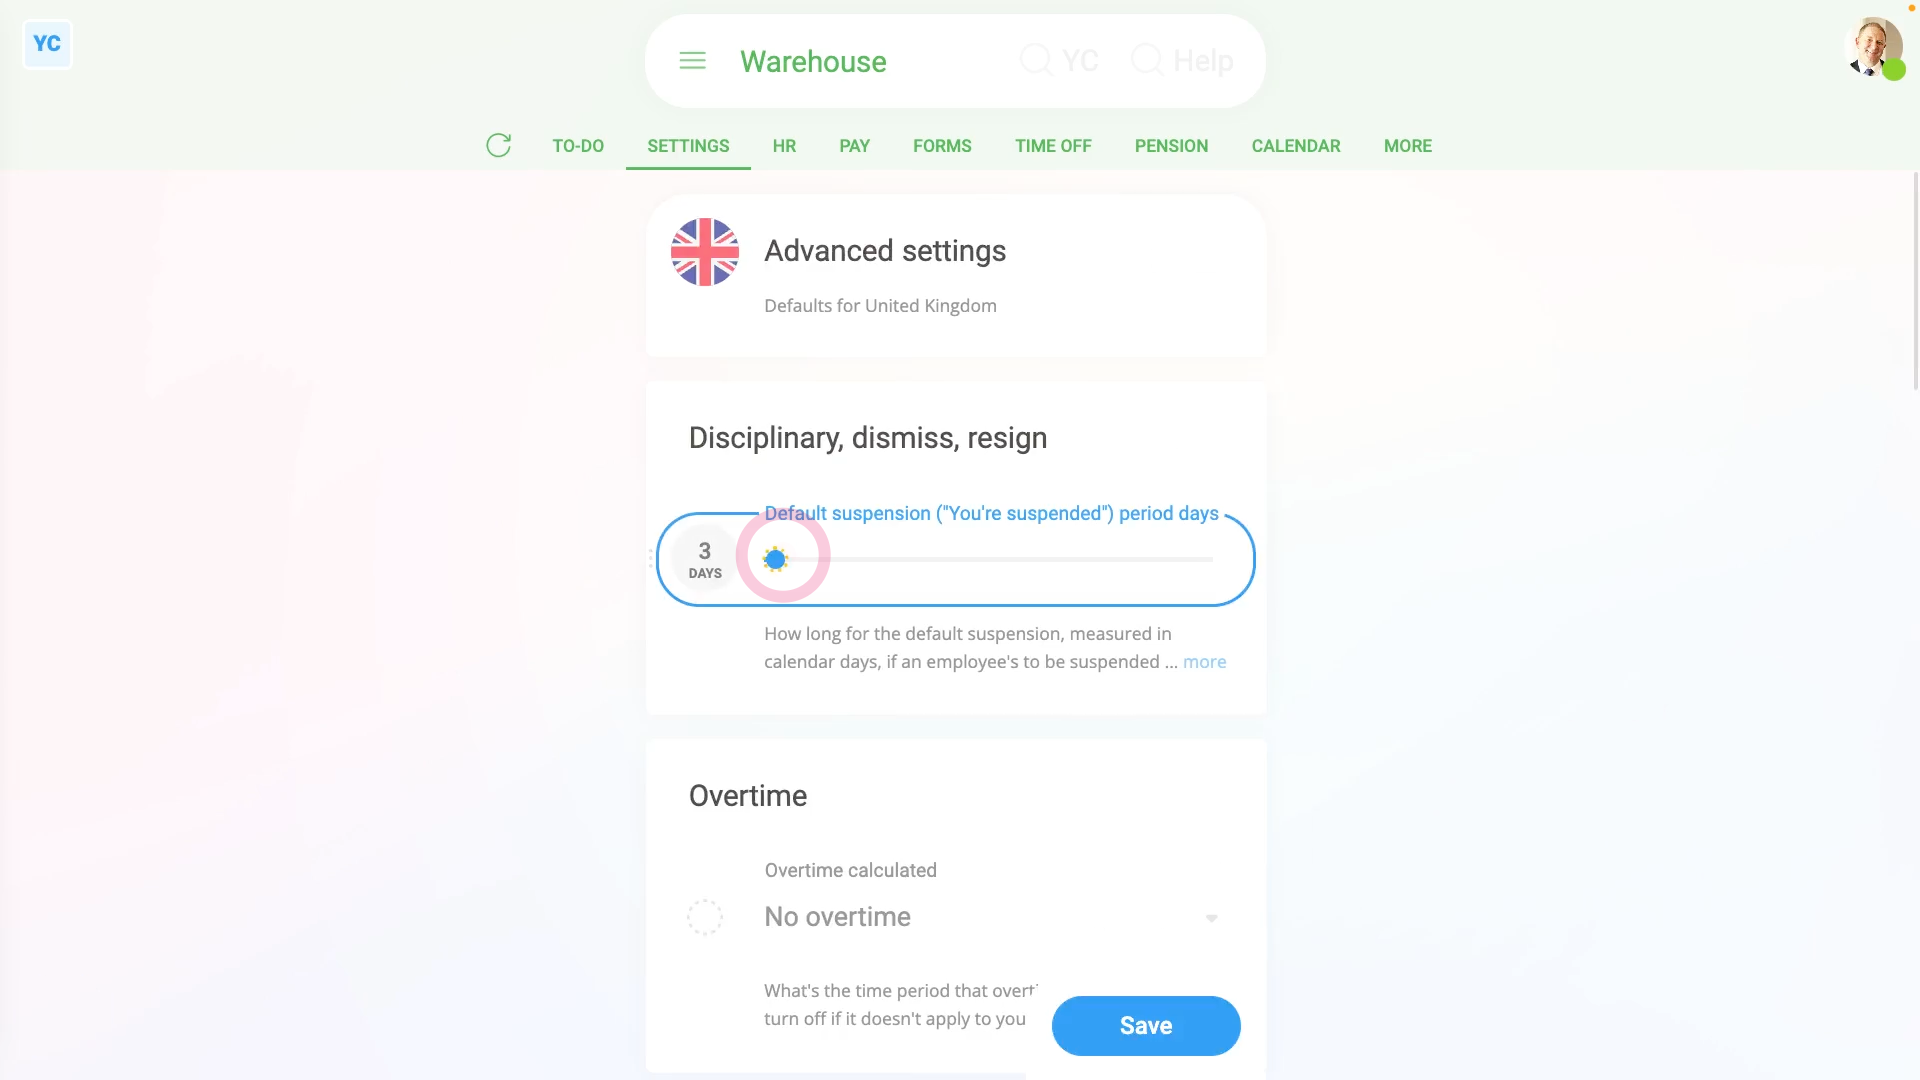
- First, to set the default suspension period days:
Select the pay batch on: MenuPay batches - Then tap: SettingsAdvanced
- Select your preferred default suspension period days by changing: Default suspension ("You're suspended") period days
- Then tap: Save
- To check the person you're suspending is in the right pay batch:
Select the person you're suspending on: MenuPeople - Then tap: PayPay settings
- And then check which pay batch the person belongs to.
- To do the suspension for the person:
Tap: HRDisciplinary - Then select the category that best fits the reason the person's being suspended.
- In many cases, disciplinaries that are marked as "Gross misconduct" could be accompanied with a suspension.
- And select a "Write-up level" that includes: "suspension"
- Then decide if the person's suspension period is to be paid or un-paid.
- Next, you'll see the default suspension period days that you set for the person's pay batch.
- To change it to the actual number of calendar days you'd like to apply, tap it, and change it.
- Then tap Next, and you'll see the number of calendar days has changed.
- Then when you're ready, tap: "Yes" to all the above
- To see the details of the suspension, tap See all tasks, and then expand the first section.
- And finally, you'll see the suspension's number of calendar days, the start date, and the end date.
- In some cases, you may want to adjust the start date, or number of days. Especially if the suspension's going over a weekend, when the person normally doesn't work.
- And you'll see both start and end dates automatically update.
- It may also be helpful to read the notes about suspension.
- Then when you're ready, tap Continue, and then: Yes ... do it
- To send the doc:
Fill in the red pick lists. - Then scroll down to the "Suspension" section and check you're happy with everything.
- Then when you're ready, tap Request "Got it", and then: Yes ... request "Got it"
- The person's now been emailed a link to their doc, and you can tap: Close
- You'll now be left on the "Recorded events" page.
- And you'll see the "Write-up" you've issued.
- Tap it, to expand it, and see the details.
- And finally, you'll see details about the suspension, including if it was paid, when it starts, how many calendar days, and when it's set to end.
- To see a copy of the doc you've issued:
Tap the "View" button: (at the end of the first row) - Once the person's tapped Got it on their doc, the person gets a PDF copy emailed to them, and you'll see the yellow hourglass change to a green tick.
- To see any pay adjustment on their payslip:
If the person's paid "hourly by timesheets", and it's a paid suspension, the person's got those days' target hours added to their pay. - To see the hours added to their pay, tap: PayPayslip
- Check that the suspension starts before the end of the payslip's pay period.
- If the suspension starts after the end of the payslip's pay period, tap the "Next payslip" circle to go forward a payslip.
- Then tap: Hours worked
- And finally, for the paid "hourly by timesheets" suspended person. You'll see that because it's a paid suspension, the correct hours have been added to their pay.
For advanced usage:
- If the person's paid "hourly by timesheets", and it's an UNPAID suspension, then no hours are added.
- If the person's paid by salary, or "hourly by targets", and it's an UNPAID suspension, then a proportionate amount of pay, or hours, are deducted.
- And if the person's paid by salary, or "hourly by targets", and it's a PAID suspension, then nothing's added or deducted from their pay, or hours.
Keep in mind that:
- The suspension period days is always set as calendar days, not working days.
- For example, setting the suspension period days to 7 calendar days, for most people would mean suspension for 5 working days. Because most people don't work for the 2 weekend days.
- However, it could vary depending on their target working hours.
You may notice:
- That suspensions can only be attached to a disciplinary that's a: "Write-up"
- If the disciplinary's only a "File note", it's not considered severe enough. So the hearing and suspension options won't show up.
And that's it! That's everything you need to know about setting default suspension period days, and seeing how it's used when issuing a suspension!
Was this page helpful?
How do I instantly dismiss a person with pay in lieuHow do I record a person's resignation, if it's NOT agreed